One of the basic steps of implementing CI/CD is integrating your SCM (Source Control Management) tool with your CI tool. This saves you time and keeps your project updated all the time. One of the most popular and valuable SCM tools is GitHub. In this blog I will explain how to integrate Jenkins with GitHub projects.

Step 1: Create a Repository in Git Hub . In my case I have created a repository named jenkinsdemo.

Step 2: Create a python file (.py) file in your Repository. In my case I have created check.py.

| print("Entered Check") import time | |
| print("new python file") | |
| time.sleep(5) | |
| print("hello world") | |
| time.sleep(5) | |
| print("hi everyone") |
Configuring Jenkins
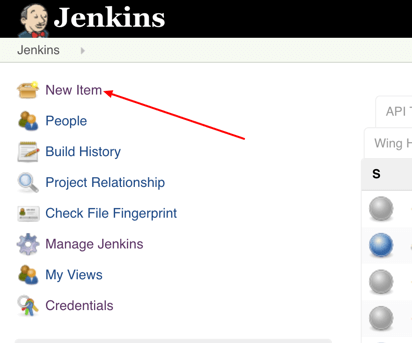
Step 5: In Jenkins, click on ‘New Item’ to create a new project.
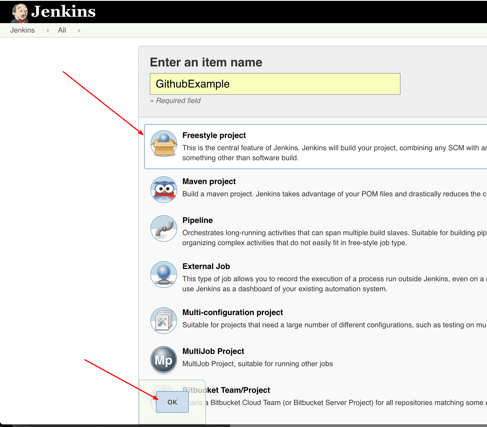
Step 6: Give your project a name, then choose ‘Freestyle project’ and finally, click on ‘OK’.
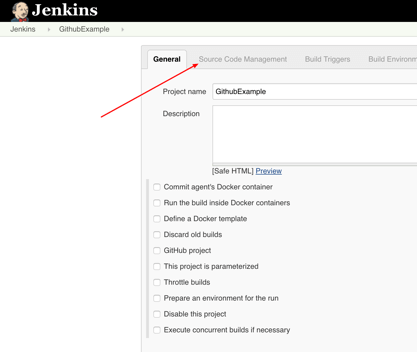
Step 7: Click on the ‘Source Code Management’ tab.
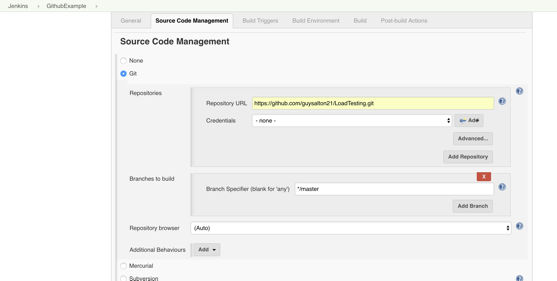
Step 8: Click on Git and paste your GitHub repository URL in the ‘Repository URL’ field.
Step 9: ADD Credentials. Give your git hub username and password. Give a ID(your wish).

Step 10: After Adding the credentials, In the credentials column , the entered details will show up.

Step 11: Mention the branch in git.....(main in my case) as shown in above pic
Step 12: Execute using a windows batch.

Step 13: After building Save and Build now. The output...

Comments
Post a Comment